1. Saving States
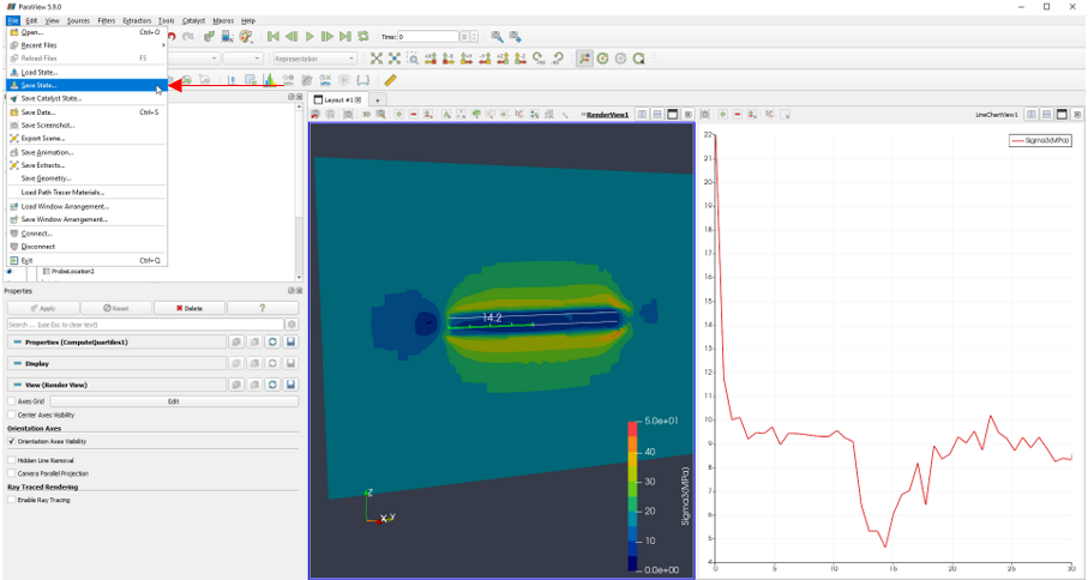
Saving the current state of a model is straight forward in ParaView. In the top menu bar, navigate to File followed by Save State.

To load a previous state the steps are the same except select Load State.
2. Saving Screenshots
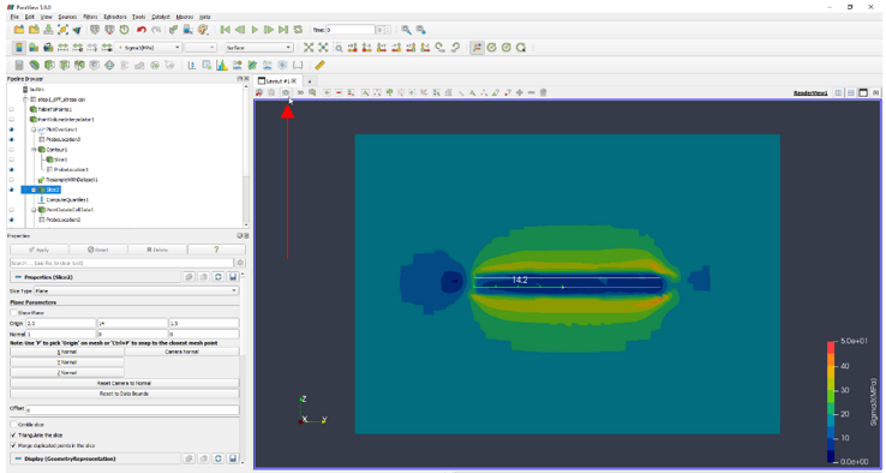
There are few ways to save screen shots in ParaView. In the layout window, press the screenshot button as indicated. This will copy the image to the clipboard where it can be pasted into other programs, such as paint. Alternatively, holding ctrl and clicking this button will open a save dialogue window where resolution and file format settings can be altered.

Another method is to use a program, such as Greenshot. Greenshot is a free program that makes taking screen shots easy. you can define capture regions, set automatic file naming conventions and output destinations using this program.
ParaView also has similar features built into the program under extractors in the top bar menu. Using extractors, you can set a program to export automatically on the basis of timesteps in Paraview.
3. Custom Viewpoints
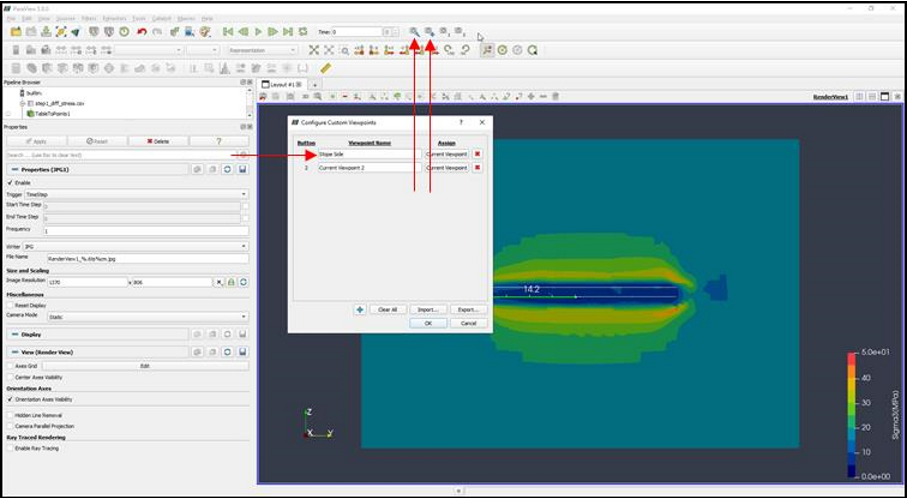
Something else to consider when setting up a workspace is the use of custom viewpoints. Custom viewpoints save your current camera settings and adds them to the top menu bar with its own button.
You can also edit the names of the custom viewpoints to be more descriptive of what they show. This way you can redefine, for example a cut plane, then hit the button to return to the same viewpoint then use the screenshot button to export the current view. This is particularly useful for when you wish to compare different timesteps in a model.
